Managing event schedules on a WordPress site can be a tedious and time-consuming task. Many site owners struggle to keep their Google Calendar information up-to-date, leading to outdated or inaccurate event listings. However, automating your event calendar can save you time and ensure your visitors always see the most current schedule.
In this comprehensive guide, we’ll walk you through the process of integrating Google Calendar with your WordPress site. Whether you’re running a local business, organizing community events, or hosting online courses, this step-by-step tutorial will help you seamlessly display your Google Calendar on your website.
Why Integrate Google Calendar with WordPress?
If you use Google Calendar to manage your events, displaying it on your WordPress site can save you time and improve user experience. Here’s why:
- Automatic Updates: Any changes you make to your Google Calendar will automatically reflect on your website, ensuring your visitors always see the latest information.
- Improved User Experience: Visitors can easily view event details, such as dates, times, locations, and descriptions, without needing to contact you.
- Versatility: Google Calendar is perfect for a variety of use cases, including fitness classes, webinars, coaching sessions, and more.
For example, if you run a gym website, you can display class schedules, free trials, and special events. Or, if you host webinars, you can include links to virtual meetings directly in the event description.
How to Add Google Calendar to WordPress (Step-by-Step)
Follow these steps to integrate Google Calendar with your WordPress site:

Step 1: Install a Google Calendar Plugin
The easiest way to add Google Calendar to WordPress is by using a plugin like Pretty Google Calendar. This plugin allows you to display events from a public Google Calendar in a mobile-responsive layout.
- Install and activate the Pretty Google Calendar plugin. For detailed instructions, refer to our guide on how to install a WordPress plugin.
- After activation, go to Settings » Pretty Google Calendar Settings in your WordPress dashboard.
- You’ll need to enter a Google API key, which we’ll create in the next step.
Step 2: Create a Google API Key
To connect your Google Calendar to WordPress, you’ll need a Google API key. Here’s how to create one:
- Go to the Google Cloud Console.
- Create a new project by clicking Create or Select a Project and naming it (e.g., “WordPress Calendar”).
- Once the project is created, search for Google Calendar API in the API Library.
- Enable the Google Calendar API for your project.
- Navigate to Credentials in the left-hand menu and click Create Credentials. Select API Key.
- Copy the generated API key and restrict it to your website for security:
- Click Edit API Key.
- Under Application Restrictions, select Websites and add your site’s URL.
- Under API Restrictions, restrict the key to the Google Calendar API.
- Save your changes.
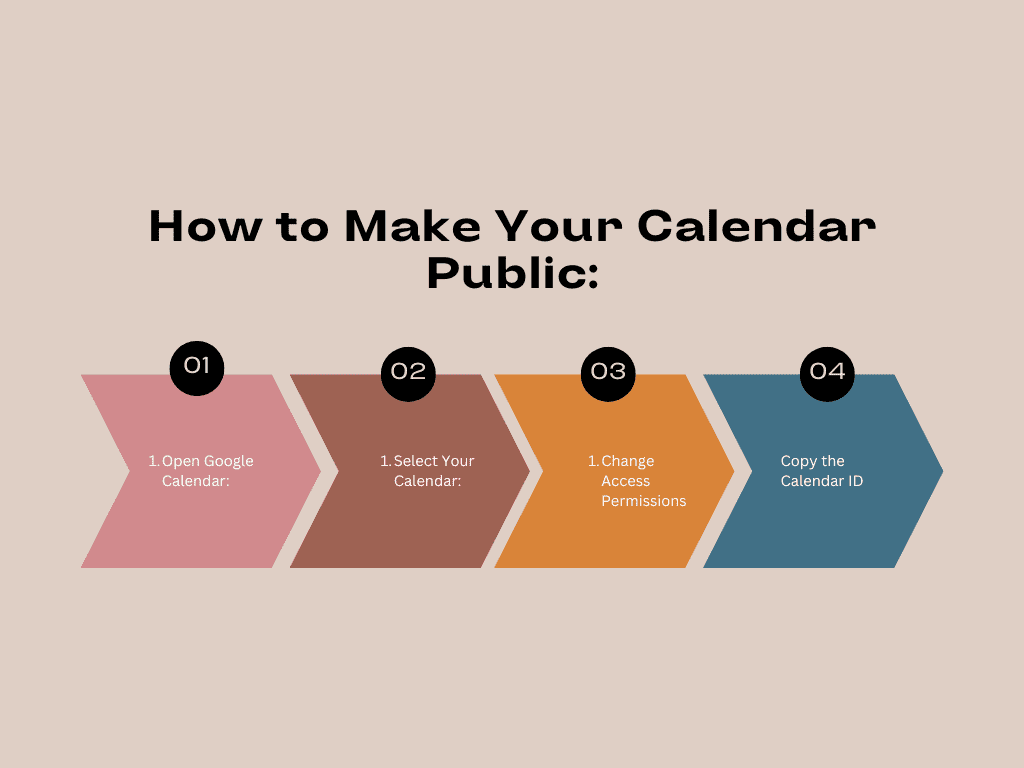
Step 3: Make Your Google Calendar Public
To display your Google Calendar on your WordPress site, you’ll need to make it public and obtain its Calendar ID.
- Open your Google Calendar and click the Gear Icon > Settings.
- Under Settings for My Calendars, select the calendar you want to display.
- Scroll to Access Permissions and check the box next to Make Available to Public.
- Under Integrate Calendar, copy the Calendar ID. You’ll need this for the next step.
Step 4: Display Your Google Calendar on WordPress
Now that your Google Calendar is public and you have the API key and Calendar ID, you can display it on your WordPress site.
Method 1: Add Google Calendar to a Page or Post
- Open the page or post where you want to display the calendar.
- Add a Shortcode block.
- Paste the following shortcode:
- Publish or update the page.
Method 2: Add Google Calendar to a Sidebar or Widget Area
- Go to Appearance » Widgets in your WordPress dashboard.
- Add a Shortcode widget to your desired widget area (e.g., sidebar).
- Paste the same shortcode as above.
- Save your changes.
Step 5: Add an Event or Appointment Booking Form (Optional)
To take your event management to the next level, consider adding a booking form to your site. A plugin like Turbo Addon makes it easy to create user-friendly forms for event registration or appointment scheduling.
- Install and activate Turbo Addon.
- Use a pre-made template to create a booking form.
- Add the form to your site using a shortcode or block.
Detailed Explanation of Each Step
Step 1: Install a Google Calendar Plugin
The first step in integrating Google Calendar with your WordPress site is to install a plugin that can handle the integration. There are several plugins available, but Pretty Google Calendar is one of the most popular and user-friendly options.
Why Use Pretty Google Calendar?
- Mobile-Responsive Design: The calendar will look great on any device, whether it’s a desktop, tablet, or smartphone.
- Easy to Use: The plugin provides a simple interface for adding and managing your calendar.
- Customizable: You can customize the appearance of the calendar to match your site’s design.
How to Install the Plugin:
- Log in to your WordPress dashboard.
- Navigate to Plugins » Add New.
- Search for Pretty Google Calendar.
- Click Install Now and then Activate.
Once the plugin is activated, you’ll need to configure it by entering your Google API key, which we’ll cover in the next step.
Step 2: Create a Google API Key
To connect your WordPress site to Google Calendar, you’ll need a Google API key. This key acts as a bridge between your WordPress site and Google’s servers, allowing data to be transferred securely.
Why Do You Need an API Key?
- Security: The API key ensures that only authorized applications (like your WordPress site) can access your Google Calendar data.
- Functionality: The API key enables the plugin to fetch and display your calendar events.
How to Create an API Key:
- Go to Google Cloud Console: Visit the Google Cloud Console and sign in with your Google account.
- Create a New Project: Click on Create or Select a Project and give it a name (e.g., “WordPress Calendar”).
- Enable the Google Calendar API: In the API Library, search for Google Calendar API and enable it for your project.
- Generate the API Key: Navigate to Credentials and click Create Credentials. Select API Key from the dropdown menu.
- Restrict the API Key: For security purposes, restrict the API key to your website. Under Application Restrictions, select Websites and add your site’s URL. Then, under API Restrictions, restrict the key to the Google Calendar API.
Once you’ve created and restricted the API key, copy it and paste it into the Pretty Google Calendar Settings page in your WordPress dashboard.
Step 3: Make Your Google Calendar Public
Before you can display your Google Calendar on your WordPress site, you’ll need to make it public. This allows the plugin to access and display your calendar events.
Why Make Your Calendar Public?
- Accessibility: Making your calendar public ensures that anyone visiting your site can view the events.
- Automation: Public calendars can be automatically updated, so any changes you make will be reflected on your site.
How to Make Your Calendar Public:

- Open Google Calendar: Go to your Google Calendar and click the Gear Icon > Settings.
- Select Your Calendar: Under Settings for My Calendars, click on the calendar you want to display.
- Change Access Permissions: Scroll to Access Permissions and check the box next to Make Available to Public.
- Copy the Calendar ID: Under Integrate Calendar, copy the Calendar ID. You’ll need this for the next step.
Step 4: Display Your Google Calendar on WordPress
Now that your Google Calendar is public and you have the API key and Calendar ID, you can display it on your WordPress site.
Method 1: Add Google Calendar to a Page or Post
- Open the Page or Post: Go to the page or post where you want to display the calendar.
- Add a Shortcode Block: Click the + Add Block button and search for Shortcode.
- Paste the Shortcode: Enter the following shortcode:
- Publish or Update: Click Publish or Update to make the calendar live.
Method 2: Add Google Calendar to a Sidebar or Widget Area
- Go to Widgets: Navigate to Appearance » Widgets in your WordPress dashboard.
- Add a Shortcode Widget: Drag the Shortcode widget to your desired widget area (e.g., sidebar).
- Paste the Shortcode: Enter the same shortcode as above.
- Save Changes: Click Save to make the calendar live.
Step 5: Add an Event or Appointment Booking Form (Optional)
To enhance your event management, consider adding a booking form to your site. This allows visitors to register for events or book appointments directly from your website.
Why Use Turbo Addon?
- User-Friendly: Turbo Addon is easy to use, even for beginners.
- Pre-Made Templates: The plugin offers 1300+ templates, including booking forms.
- Customizable: You can customize the form to match your site’s design.
How to Create a Booking Form:
- Install Turbo Addon: Go to Plugins » Add New and search for Turbo Addon. Install and activate the plugin.
- Create a New Form: Navigate to Turbo Addon» Add New and select a booking form template.
- Customize the Form: Add fields for event registration, such as name, email, and event selection.
- Add the Form to Your Site: Use the provided shortcode to add the form to a page or post.
Additional Tips for Managing Your WordPress Site
Now that you’ve automated your event calendar, here are some additional tips to improve your WordPress site:
- Schedule Posts: Use the built-in scheduling feature in WordPress to plan and publish your content at optimal times.
- Optimize for SEO: Use an SEO plugin like Yoast SEO to improve your site’s search engine rankings.
- Monitor Performance: Use tools like Google Analytics to track your site’s performance and visitor behavior.
- Backup Your Site: Regularly backup your site to protect against data loss.


